Introduction
Nail art is a fun way to express yourself and add a pop of color to your look. But sometimes, buying special tools and nail stickers can get expensive. The good news is, you don’t need fancy supplies to create beautiful nail designs. Many household items can help you make creative and stylish nail art at home without spending much money.
In this article, you’ll find budget-friendly nail art ideas using items you probably already have around the house. These simple tricks will help you transform your nails into mini works of art with no stress or big costs!
1. Toothpick Art
Toothpicks are great for drawing tiny details, lines, and dots on your nails.
How to use:
- Use the pointed tip of a toothpick to create dots, stripes, or small flowers.
- Dip the toothpick in nail polish and gently touch your nail to make designs.
- You can make polka dots, hearts, or even simple abstract shapes.
Try this look: Paint your nails a solid color and add white or black dots using a toothpick for a cute polka dot manicure.
2. Tape for Clean Lines
Regular sticky tape or scotch tape can help you make clean, sharp lines or geometric shapes.
How to use:
- Paint your nails with a base color and let it dry completely.
- Cut thin strips of tape and place them on your nails in any pattern you like—diagonal lines, squares, or triangles.
- Paint over with a second color.
- Carefully peel off the tape before the polish dries.
Try this look: Create a modern, geometric design with black and white polish using tape.
3. Bubble Wrap for Cool Patterns
Bubble wrap is an unexpected tool that can give your nails a fun textured pattern.
How to use:
- Paint your nails a base color and let dry.
- Cut a small piece of bubble wrap.
- Dab nail polish in a contrasting color onto the bubble wrap.
- Press the bubble wrap gently onto your nails to transfer the pattern.
- Finish with a clear top coat.
Try this look: Use pastel colors and bubble wrap to create a unique spotted design.
4. Cotton Swabs for Precise Cleaning and Art
Cotton swabs (Q-tips) are great for fixing mistakes or creating art.
How to use:
- Dip a cotton swab in nail polish remover to clean edges or smudges around nails.
- Use the rounded tip to create larger dots or simple shapes on nails.
Try this look: Create a simple polka dot pattern using cotton swabs with contrasting polish colors.
5. Aluminum Foil for Foil Nails
If you don’t have special foil nail kits, aluminum foil from your kitchen can be a fun substitute.
How to use:
- Paint your nails with a sticky base coat or tacky polish layer.
- Tear small pieces of aluminum foil and gently press them onto your nails.
- Press firmly and lift slowly for a shiny foil effect.
- Seal with a clear top coat.
Try this look: Use gold or silver metallic polish underneath and add aluminum foil for a luxe shine.
6. Rubber Bands for Striped Nails
Rubber bands can help create striped patterns easily.
How to use:
- Paint your nails a base color and wait to dry.
- Stretch thin rubber bands across your nails in different directions.
- Paint over the nails with another color.
- Remove the rubber bands carefully while the polish is still wet.
Try this look: Use bright colors and black rubber bands to make cool stripes.
7. Toothbrush for Splatter Art
A clean toothbrush can help you make fun paint splatter designs.
How to use:
- Dip a toothbrush in nail polish or acrylic paint.
- Flick the bristles with your finger to create tiny splatters on your nails.
- Work over a base color and cover with a top coat after drying.
Try this look: Use dark polish on light nails and flick white or bright colors for a cool effect.
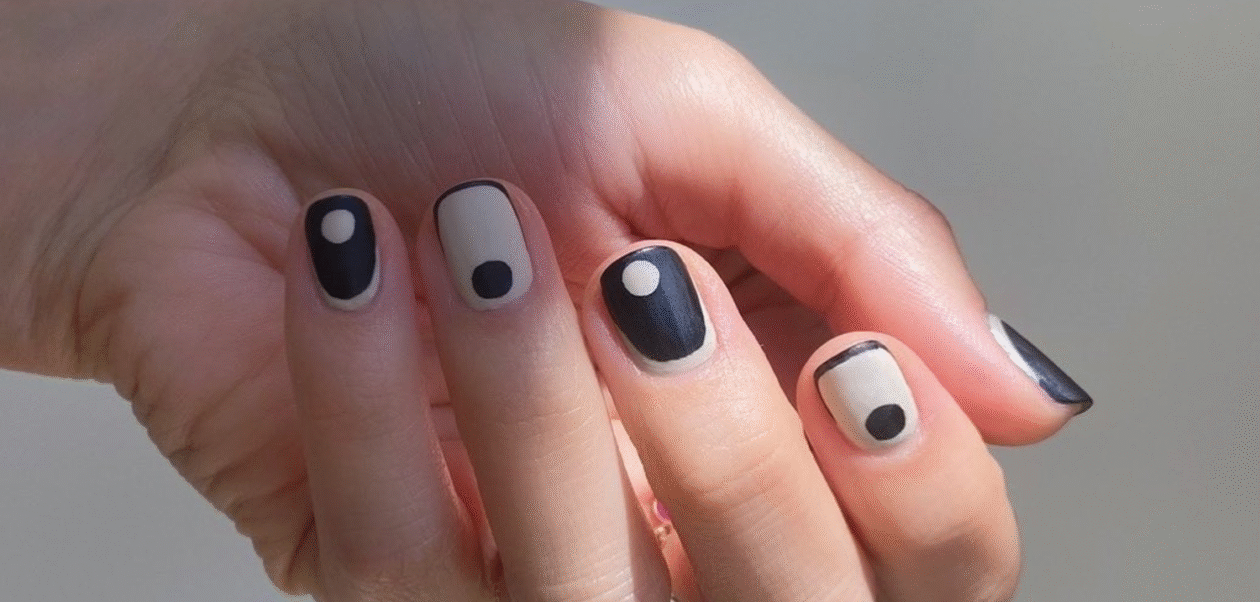
8. Pencil Eraser for Perfect Polka Dots
A pencil eraser makes a great dotting tool.
How to use:
- Dip the flat end of a pencil eraser into polish.
- Press gently on your nails to create uniform dots.
- Use different sizes of erasers for varying dot sizes.
Try this look: Make colorful polka dots on a neutral base for a fun, playful design.
9. Plastic Wrap for Marble Effect
Plastic wrap (cling film) can help you create a trendy marble or textured effect.
How to use:
- Paint your nails a light base color and let dry.
- Apply a darker color over one nail.
- Before it dries, gently dab crumpled plastic wrap on the nail to create a marbled look.
- Seal with a top coat.
Try this look: Use soft pink and white colors for a delicate marble manicure.
10. Bobby Pins for Thin Lines and Stripes
Bobby pins can work as mini paintbrushes for thin lines.
How to use:
- Open a bobby pin so you have a straight line with a small tip.
- Dip the tip into polish and carefully draw thin lines on nails.
- Use for stripes, cross patterns, or delicate designs.
Try this look: Combine black stripes with bright colors for a modern chic look.
Extra Tips for DIY Nail Art at Home
- Always start with clean, dry nails.
- Use a base coat to protect your nails from staining.
- Apply thin layers of polish for quicker drying and smooth finish.
- Finish with a clear top coat to protect your art and add shine.
- Don’t rush! Let each layer dry completely before moving on to the next step.
- Practice on a piece of paper or plastic before trying on nails if you’re new to nail art.
Conclusion
Creating stylish nail art doesn’t have to be expensive or complicated. With these budget-friendly ideas using household items, you can make fun, creative designs right at home without buying special tools.
Grab your nail polish, find some common household items, and start experimenting. You’ll be amazed at how beautiful and unique your nails can look with just a little creativity and some simple supplies.
Try these ideas and enjoy showing off your DIY nail art on a budget!